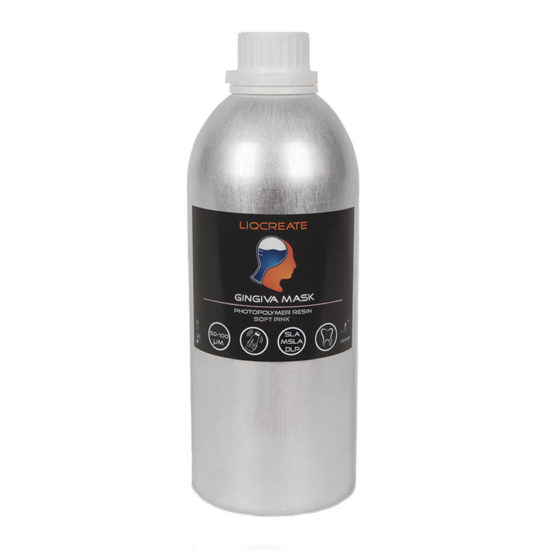
Liqcreate Gingiva Mask is a pink colored photopolymer resin. This resin is designed for for manufacturing soft tissue, gum-like parts for dental implant models. Gingiva Mask is not a biocompatible material. Liqcreate Gingiva Mask is easy to use on open SLA, MSLA and DLP 3D-printers in the range of 385 – 420nm. It is a soft and flexible material that can be used in combination with Liqcreate Dental Model Pro Beige or Grey. Gingiva Mask opens the possibility to create the soft part for highly precise models, bridges and implant superstructures. With its soft and flexible properties, it is perfect for the production of gum parts and soft tissue which supports dental implant models and C&B projects. In this article you can find the processing instructions and touble shooting for dental use. For technical use it is recommended to use products like Liqcreate Flexible-X and Elastomer-X. If you have any questions, reach out to us at info@liqcreate.com and our technical team will assist.
The following topics are covered in this article:
- Shake before use.
- 3D-printing parameters.
- Gingiva Mask part won’t fit in dental models
- Part orientation and support settings.
- Cleaning, washing and post-curing your part.
- How to clean/filter the resin?
- Patterns in resin during/after printing.
- Minimum wall thickness.
- Part surface finish or sticky surface.
- Ideal resin printing temperature.
- Solving print failures.
- Storage conditions.
- Additional information.
Support
Do you need any help with 3D printing our SLA, DLP or LCD resins? We can help you! Just look for the question you have below. If you can’t find it, let us know by contacting us!
Technical →
1) Shake before use.
For most resin, shaking for a couple minutes is advised, especially after long storage to get a homogeneous mixture before printing. Same goes for Liqcreate Gingiva Mask. Shake for a couple minutes and let the resin rest for a couple minutes before using. During shaking the resin is homogenized, but some air bubbles will be present. If you start a print job right after shaking, air bubbles might be present in the first layers of the part. Just before starting a new print, wipe the bottom of the resin tank quickly with a soft spatula to make sure the resin is homogenized before printing.
2) 3D-printing parameters.
Liqcreate Gingiva Mask is designed for open compatibility on 405nm and 385nm DLP, MSLA, LCD and laser-based resin 3D-printers. It is important that the 3D-printer is open for 3rd party resins and parameters can be changed. A lot of parameters are already prepared and listed on our website. Click on your actual printer to see if Liqcreate Gingiva Mask parameters are available. If that is not the case, send an e-mail to our technical team at info@liqcreate.com and they will try to help.
3) Gingiva Mask 3D-printed part won’t fit in the dental model
Liqcreate Gingiva Mask has nearly no shrinkage during and after printing. As a starting setting we would advise to print without shrinkage factor. However, the resin (like many soft resins) can swell slightly when leaving it too long in ethanol/IPA/alcohol during cleaning and leaving it too long in water during the first UV-curing step. it is advised to minimize the IPA cleaning to 2 x 3 minutes. Additionally it is advised to not leave the Gingiva Mask parts in water during the first UV-curing step for more then 10 minutes. That way the parts should fit nicely in the models after printing. If you have issues with the dimensions and the Gingiva Mask parts do not fit, please contact us at info@liqcreate.com and our technical team will assist.
4) Part orientation and support settings.
There are generally two design methods for Gingiva Mask in the dental software. First and preferred option is to design the Gingiva Mask as a straigth block. This way the bottom is flat and you can 3D-print it directly on the platform without supports (example in the image below on the right side). Alternatively you can design the part with an organic shape. Organically shaped Gingiva Mask pieces can not be placed directly on the build plate and do need supports (example in the image below on the left side).
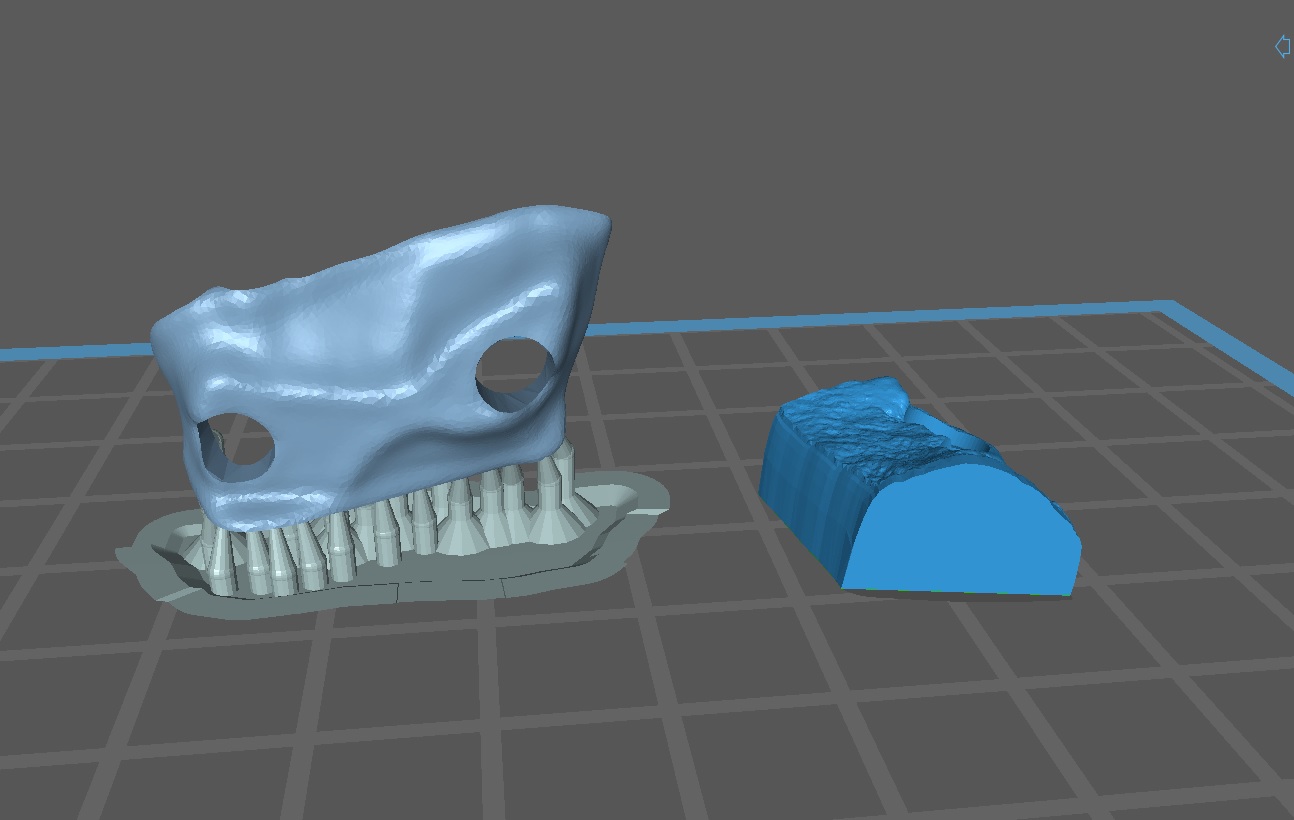
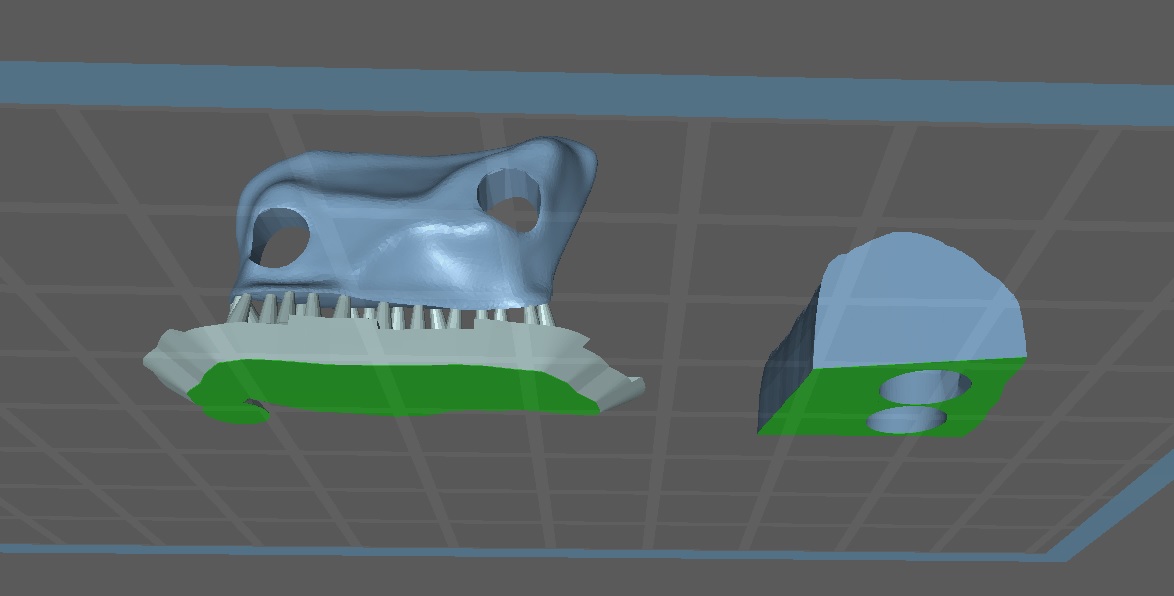
The orientation of the Gingiva Mask blocks with a flat surface is easy. Place it with the flat bottom on the build plate. Just double check that the bottom surface is completely ‘stuck’ to the build plate and is not slanted. In Chitubox software you can see a green square when it is attached to the build plate. If the complete bottom layer is green you are good to go.
For organically formed Gingiva Mask parts you have to place it on (heavy) supports. Usually the best option is to place the part on the side and add supports. After printing and post-curing you have to cut off the supports. if they are in the area that touches the model or implants it can cause trouble with fitting. usually the side (facing slightly away from the model) is the best orientation. Below you can find our basic heavy support parameters. on the left image you can reduce the contact depth to 0,3mm if supports are sticking out on the other side of the model.
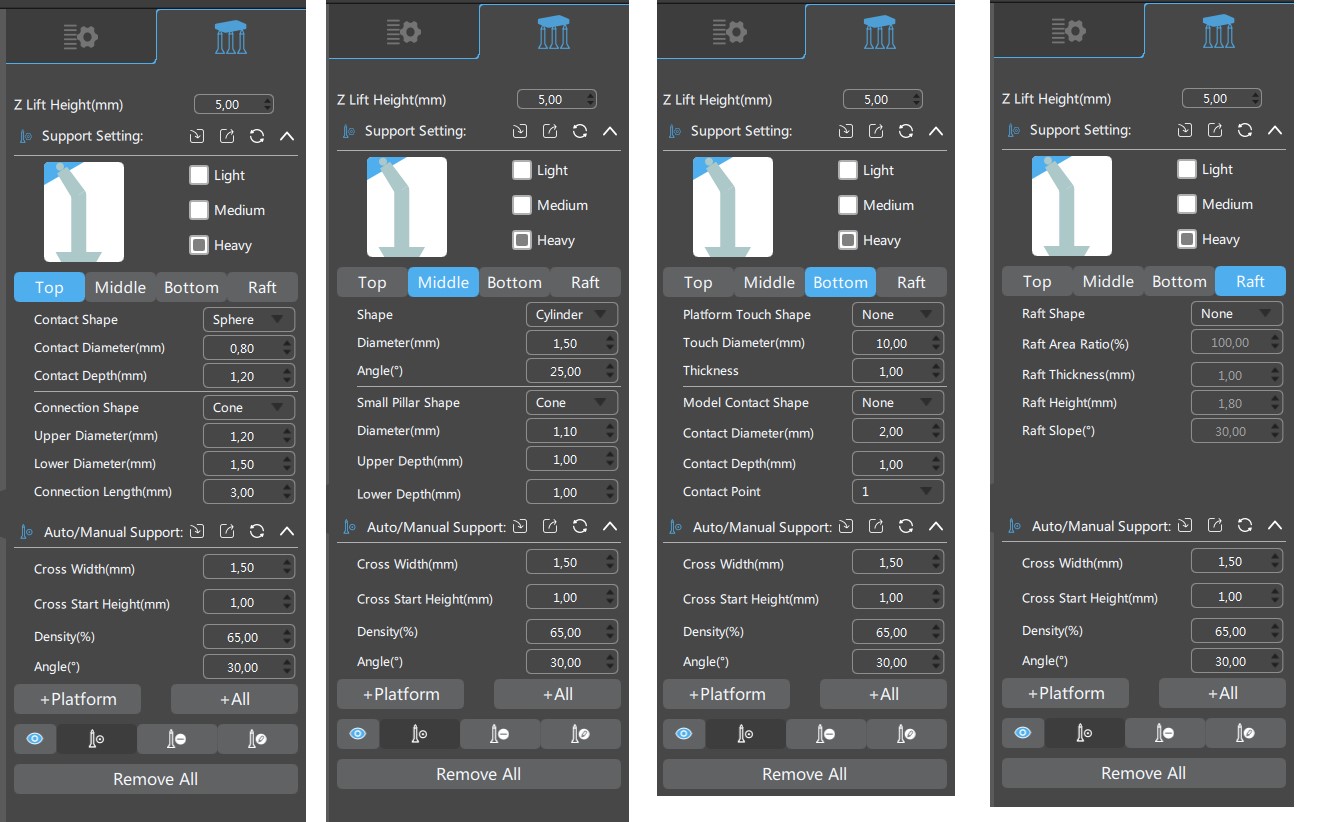 Image: Basic support settings for Liqcreate Gingiva Mask for dental gum-like tissue parts.
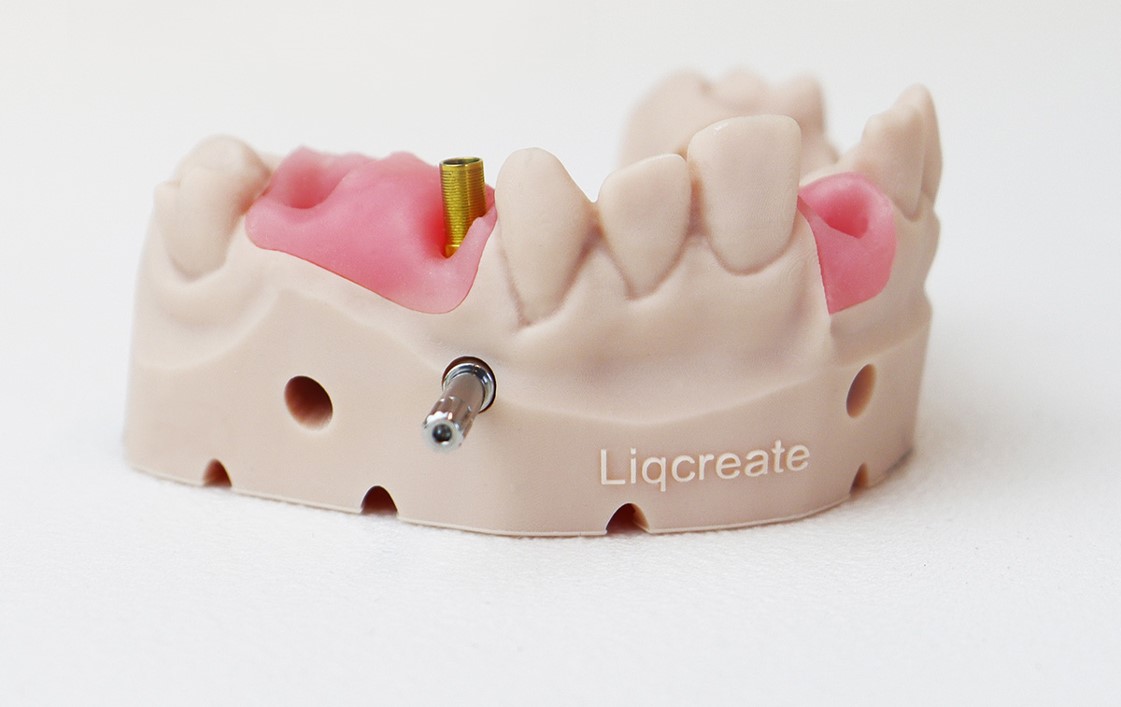
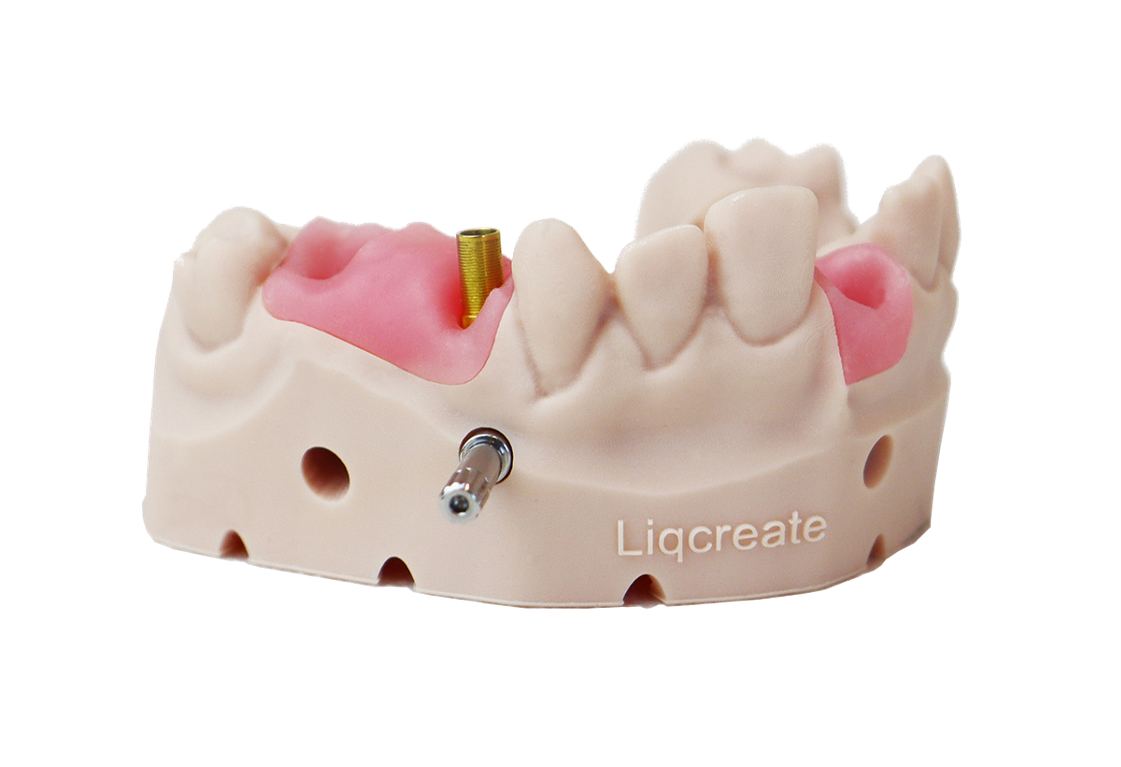
As you can see in the image below, the Gingiva Mask parts fit perfectly without interferance of support structures when they are placed correctly. The supports have to be cut/grided off gently. They are placed in a way now that the fit with the model is not interfered by supports and also the implant holes are clean.

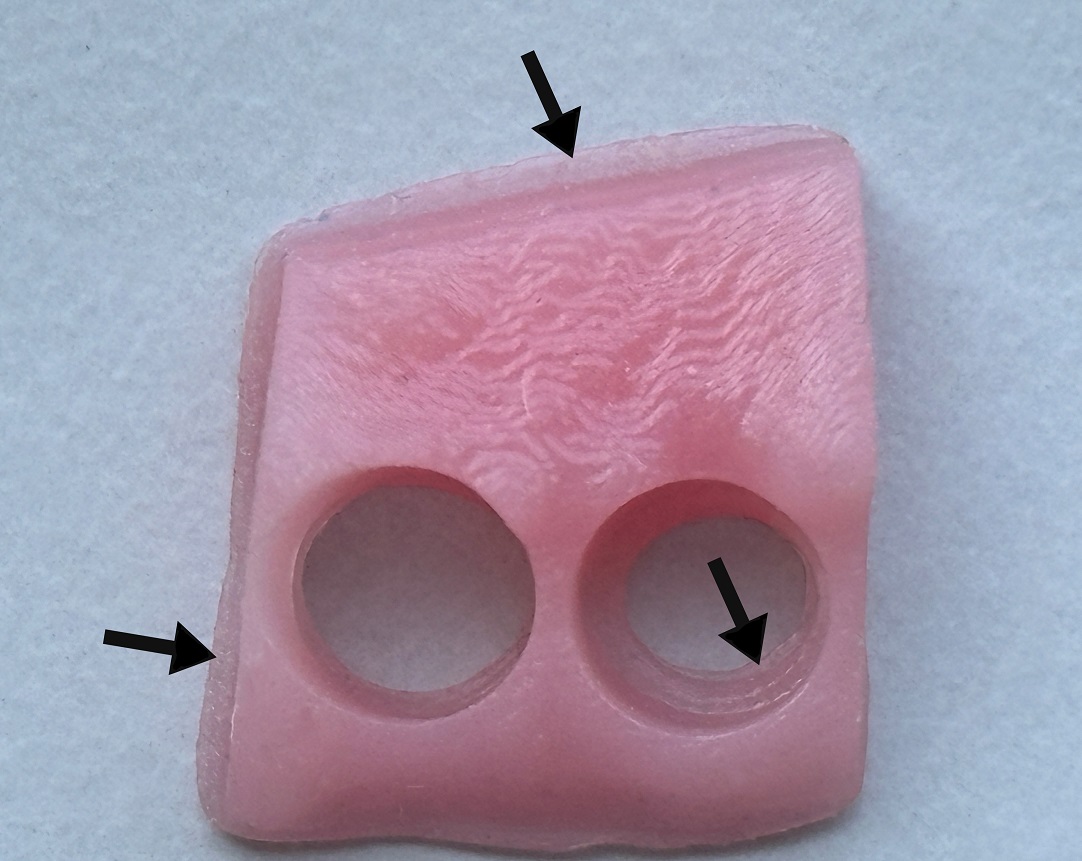
If the designed Gingiva Mask is flat from the bottom side, it can be printed straigth on the platform without supports. It should be noted that the first layer of printing is always thicker and you would have to grind away the edges (black arrow in the image below) after UV-post curing the Gingiva Mask Part.
5) Cleaning, washing and post-curing your part.
After getting a high quality resin 3D-printed object, the parts need to be cleaned and post-cured. Washing is an important step. The washing step ensures that all residual unreacted resin is washed off and can’t react with oxygen during post-curing. We advise to wash with IPA, Ethanol (preferably >85%) or the Liqcreate resin cleaner. Resin cleaner instructions can be found here. For Ethanol and IPA it is advisable to use 2 rinsing baths. One with used solvent and one with fresh solvent. Wash the parts preferably ultrasonic, and otherwise under agitation for 2 minutes in the used solution, followed by 3 minutes in the fresh Ethanol/IPA. The second rinse in fresh IPA/Ethanol will make sure no resin is left on the surface. Then let the part dry for 30 minutes. Before post-curing, inspect that the part is dry and completely free from solvent (no shiny resin spots on the surface). Otherwise wash again in fresh solvent for 1 minute. Do not wash for longer than necessary as parts can deform when exposed to IPA / Ethanol for >30 minutes when not fully cured. Also be careful if your parts are thin (<2mm) and the IPA in the ultrasonic cleaner is warm (>30°C / 86°F), parts can deform. If you notice this, either make the parts thicker or wait until the temperature of the IPA is below 30°C / 86°F.
When small holes and tight corners are difficult to clean, then brushing with a soft brush is advised to clean these specific areas. After brushing, rinse in fresh IPA / ethanol to get all resin leftovers cleaned. For Gingiva Mask UV-curing in a heated curing unit is not necessary. However, it is important to UV-cure the first 5 minutes away from oxygen. Easiest to do this is to immerse the part in water in a transparent jar during the first minutes of post-curing. Then take the parts out of the water and cure them for 25 minutes in air. Extended post-curing information and settings for different curing units can be found in this link.
6) How to clean / filter the resin?
When a part failed during printing, it is always advised to clean your resin tank. This is usually done by filtering the resin to make sure all solidified plastic pieces are gone. If cured resin parts are present when you start a new print, they can damage your FEP film of even your LCD screen. A standard resin filter will work sufficiently to filter Gingiva Mask resin.
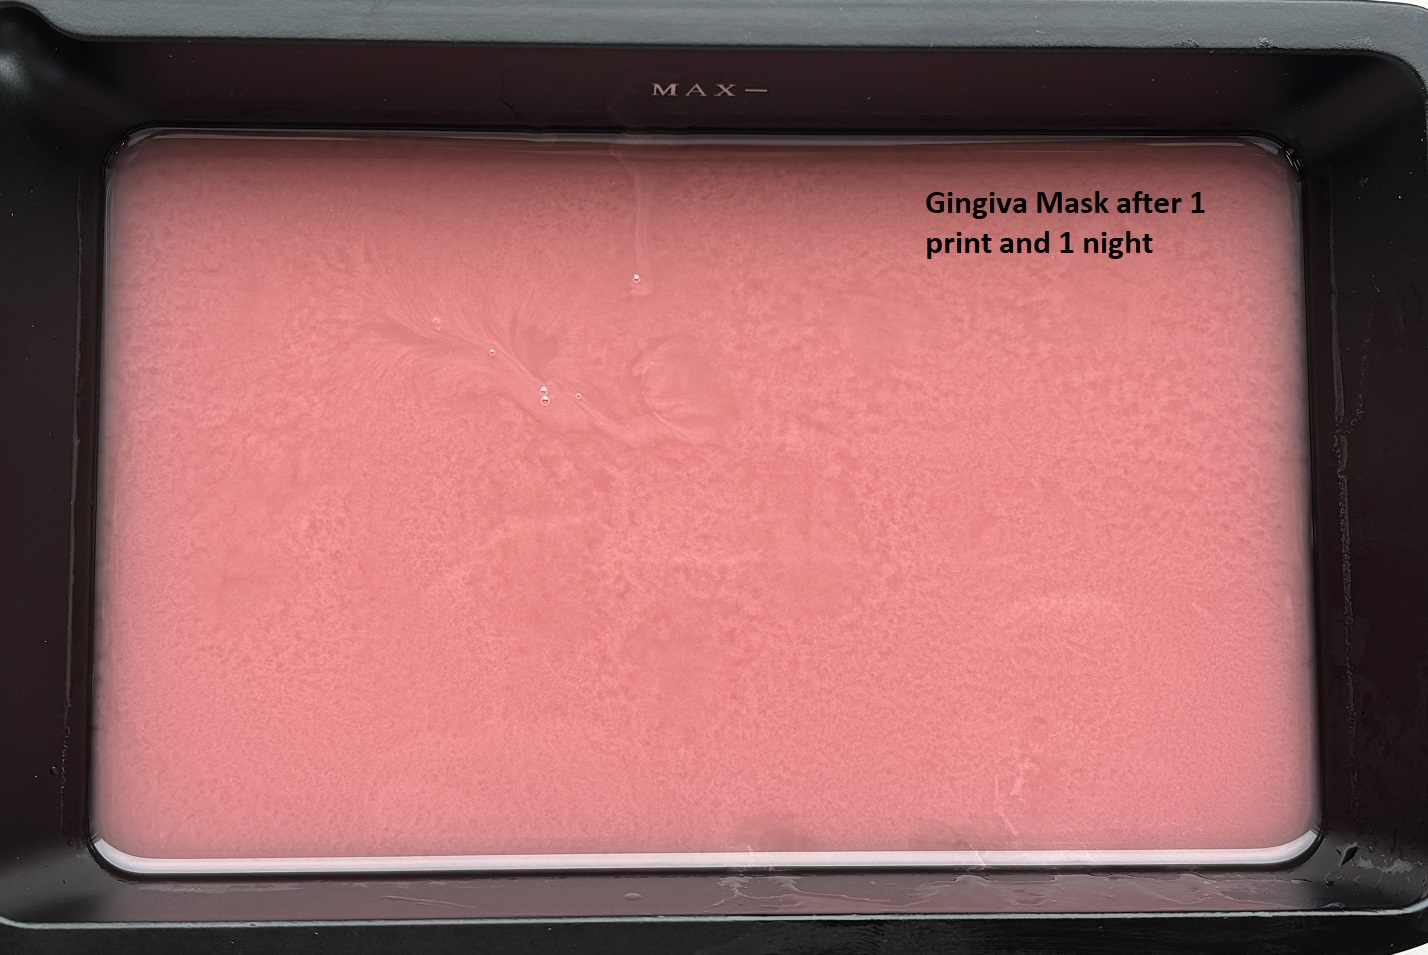
7) Patterns in resin during / after printing.
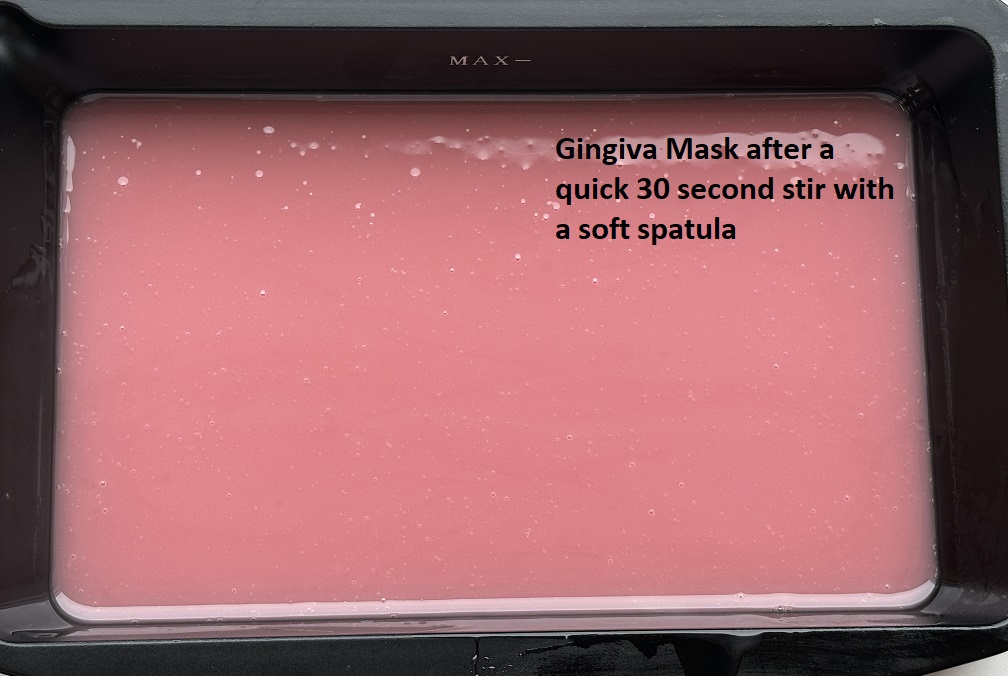
Liqcreate Gingiva Mask resins are stabilized. However, after a print or in very warm areas, there can be some de-mixing of the pigments in the resin. This effect is stronger over a longer period of time or when the temperature is higher. In some LCD based printers, the printer itself generates a lot of temperature during printing, accelerating this effect. For printing an ideal temperature of 20-25°C / 68-77°F is recommended. As the resin is stabilized this should not have an effect on your printed part. It is advised to mix the resin with a plastic spatula before running a new print. A quick stir of 30 seconds is sufficient! Alternatively, try to keep the resin at or below 25°C / 77°F if possible. External heating above 20°C / 68°F is not required and can lead to unwanted acceleration of de-mixing. After a print job or long waiting time in the printer this resin pattern is completely normal. This does not affect the printing and quality of the Gingiva Mask parts.
8) Minimum wall thickness for hollowing models.
It is advised to take a minimal wall thickness for Liqcreate Gingiva Mask of at least 1 mm, but preferably 2 mm when designing the part. Thinner parts are more difficult to print and less accurate. too thin parts can break easily and loose function as soft gum-like tissue. Take the 1-2mm minimal thickness in consideration across the whole part.
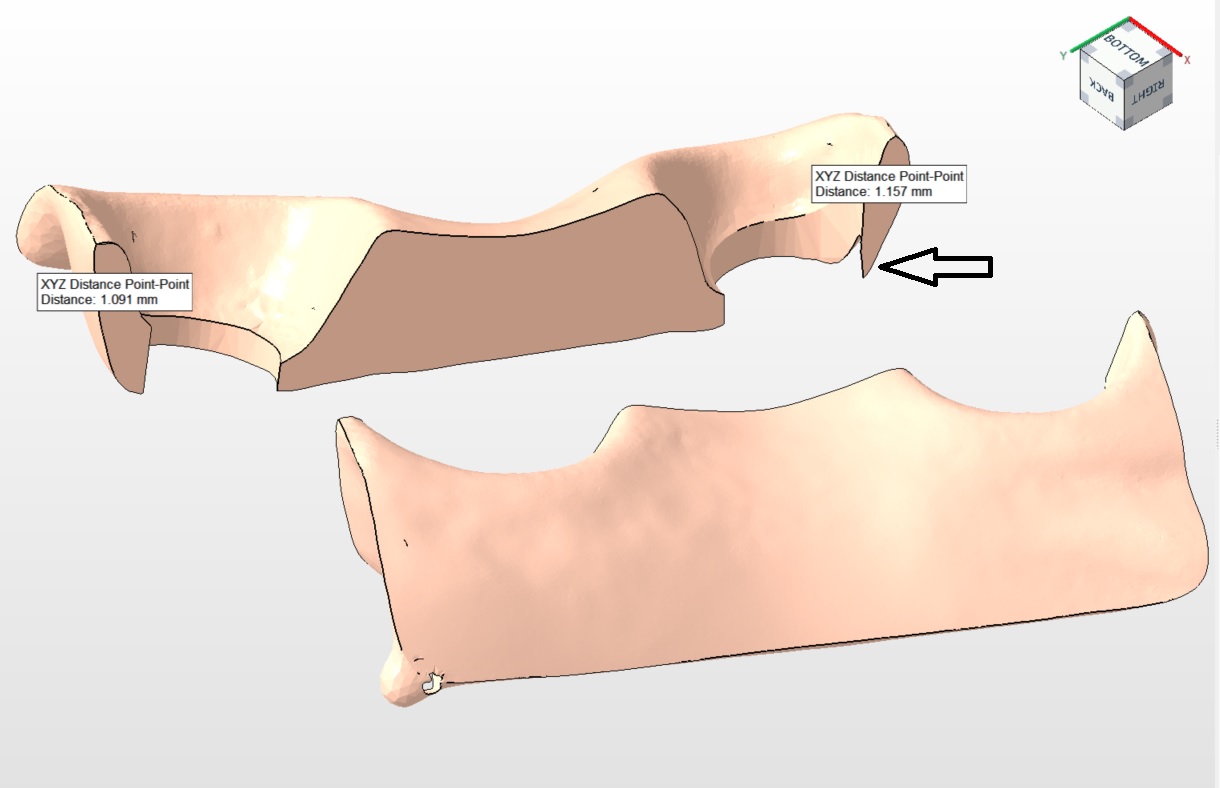
From the cross-sectioned Gingiva Mask part above you can see that the walls are acceptable everywhere except on the black arrow. For obtaining the best results it is advised that this area is thicker. If these thin areas are present in the model, it can only be printed with orientation away from the supports.
9) Part surface finish or sticky surface.
Printed parts from Liqcreate gingiva Mask are opaque and shiny during printing. A slightly matte surface will appear after washing and drying as in the picture below. Parts can be polished or coated to get a glossy surface finish. This is how a properly printed and post-cured part should look like (pinkpart only). For this resin we advise to UV post-cure the parts in a transparent jar of water for 5 minutes, followed by 25 minutes UV-curing in air. Contact us at info@liqcreate.com for assistance.
10) Ideal resin printing temperature.
It is advised to print with Liqcreate Gingiva Mask resins at at 20°C / 68°F and maximum at 25°C / 77°F. printing at lower temperature causes random failure in the material. Excessive heating can lead to faster de-mixing of the resin and is not advised.
11) Solving print failures with Liqcreate Gingiva Mask.
There are a lot of common resin 3D-printing issues. In this article you can find 10 common resin 3D-printing fails and how to solve them. If you have need support, send is an e-mail at info@liqcreate.com and our technical team will try to assist.
12) Storage conditions.
Store the product in its original bottle, plug and cap at minimal 5°C / 41°F and maximum 30°C / 86°F. Avoid sources of heat, radiation, static electricity, sunlight and contact with food.
13) Additional information.
- – Product information Gingiva Mask
- – List of compatible 3D-printers Gingiva Mask
- – Printer settings
- – Shrinkage optimization parameters
If you have any questions when working with Liqcreate Gingiva Mask or any other Liqcreate resin, send us an e-mail at info@liqcreate.com.
Gingiva Mask
Liqcreate Gingiva Mask is a pink colored photopolymer resin. This resin is perfect for manufacturing soft tissue, gum-like parts for dental implant models. Liqcreate Gingiva Mask is easy to use on open SLA, MSLA and DLP 3D-printers in the range of 385 – 420nm. It is a soft and flexible material that can be used in combination with Liqcreate Dental Model Pro Beige or Grey. Gingiva Mask opens the possibility to create the soft part for highly precise models, bridges and implant superstructures. With its soft and flexible properties, it is perfect for the production of gum parts and soft tissue which supports dental implant models and C&B projects.
Key benefits |
3D-Printer compatibility |
| · Gum look | · Asiga Max & 4K |
| · Soft touch | · Shining3D Accufab L4D |
| · Easy to use | · Phrozen, Anycubic & Elegoo series |
| · Extremely low shrinkage | · And many more |